How to Master a Track in Sound Forge Pro
Mastering in Sound Forge Pro is not a single button. It's a sequence of decisions applied to a stereo file — EQ to correct frequency balance, dynamics processing to control peaks and raise perceived loudness, loudness normalization to hit a delivery target, verification through Statistics, then export. That sequence matters as much as any individual setting, and getting the order wrong produces results that are harder to fix than starting over.
Sound Forge Pro ships with everything you need for competent stereo mastering: Paragraphic EQ, Wave Hammer 2.0, coreFX dynamics, iZotope Ozone Elements (bundled with current versions), LUFS normalization, POW-r dithering for 16-bit conversion, and the Statistics process for non-real-time loudness measurement. The Plug-In Chainer ties them into a reviewable chain before anything is committed to disk. The full feature list for the current version is on the Sound Forge product page.
What Goes in the Mastering Session: The Source File
Mastering starts with a finished stereo mix — a WAV file exported from your DAW with 2–3 dB of headroom below 0 dBFS. Not a mix that clips, not a mix that's already been limited or maximized. If the mixdown is already hitting 0 dBFS repeatedly, the mastering process has nowhere to work. You're not mixing in Sound Forge; you're finishing something that's already been mixed.
Open the file in Sound Forge Pro. Before touching any controls, run Tools → Statistics. Look at the integrated LUFS, true peak, and RMS. Write down or screenshot those numbers — this is your before-state, and you'll want to compare it to the after-state at the end. I've gone back to reference a Statistics scan from the start of a session more than once to understand why a particular choice changed the sound more than expected.
Step One: EQ
EQ is the first processing step, not the last. Everything else in the mastering chain operates on whatever frequency balance is already there — if the low end is muddy or the high end is harsh before compression, compression will make both problems more audible, not less.
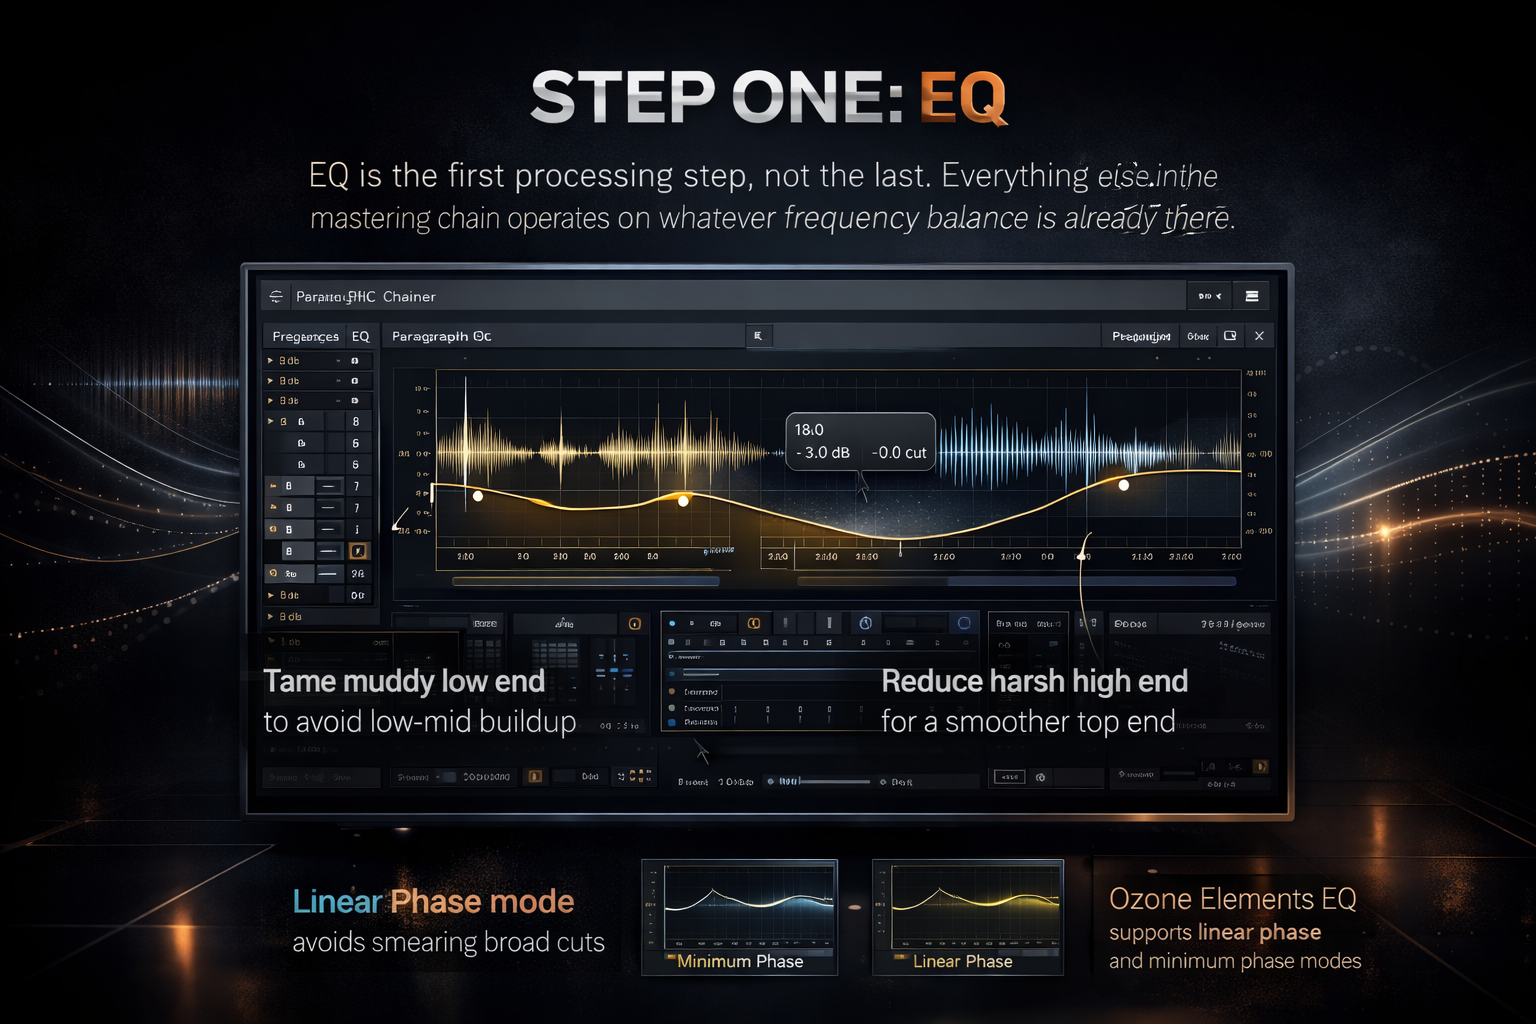
In Sound Forge Pro, mastering EQ runs through the Plug-In Chainer. The native Paragraphic EQ (Effects → Paragraphic EQ) covers the basics — shelving filters, bell curves, notches. For more precision, iZotope Ozone Elements bundles an EQ module that handles both linear phase and minimum phase modes. Linear phase is the right choice for mastering when you want to avoid phase shifts on broad corrections; minimum phase is faster-sounding and better for surgical cuts.
Listen for problems first, don't hunt for them visually. Common issues in stereo mixes are low-end buildup below 100 Hz that accumulates from multiple bass-range instruments, harshness between 2–5 kHz from distorted guitars or overcompressed vocals, and a dull top end from mixing on speakers without extended high-frequency response. Small moves — a dB or two on a broad shelf — are the standard here. Cut more than you boost. A 2 dB reduction at 200 Hz often improves clarity more than boosting 8 kHz ever will. As one mastering engineer put it in a Gearspace mastering thread: "The processing side of mastering is 90% EQ and gain staging."
On a mastering session for a 4-track indie record last year, every mix had the same 3 dB buildup at 180 Hz that the producer hadn't heard on their near-field monitors. One cut per track, applied identically. The mixes translated dramatically better on earbuds and laptop speakers — exactly the formats they cared about. EQ first.
Step Two: Compression with Wave Hammer
Wave Hammer 2.0 (Effects → Wave Hammer or via the Plug-In Chainer) is a two-stage processor. The first stage is a classic compressor; the second is a Volume Maximizer that raises the overall level after compression without letting peaks exceed a ceiling you set.
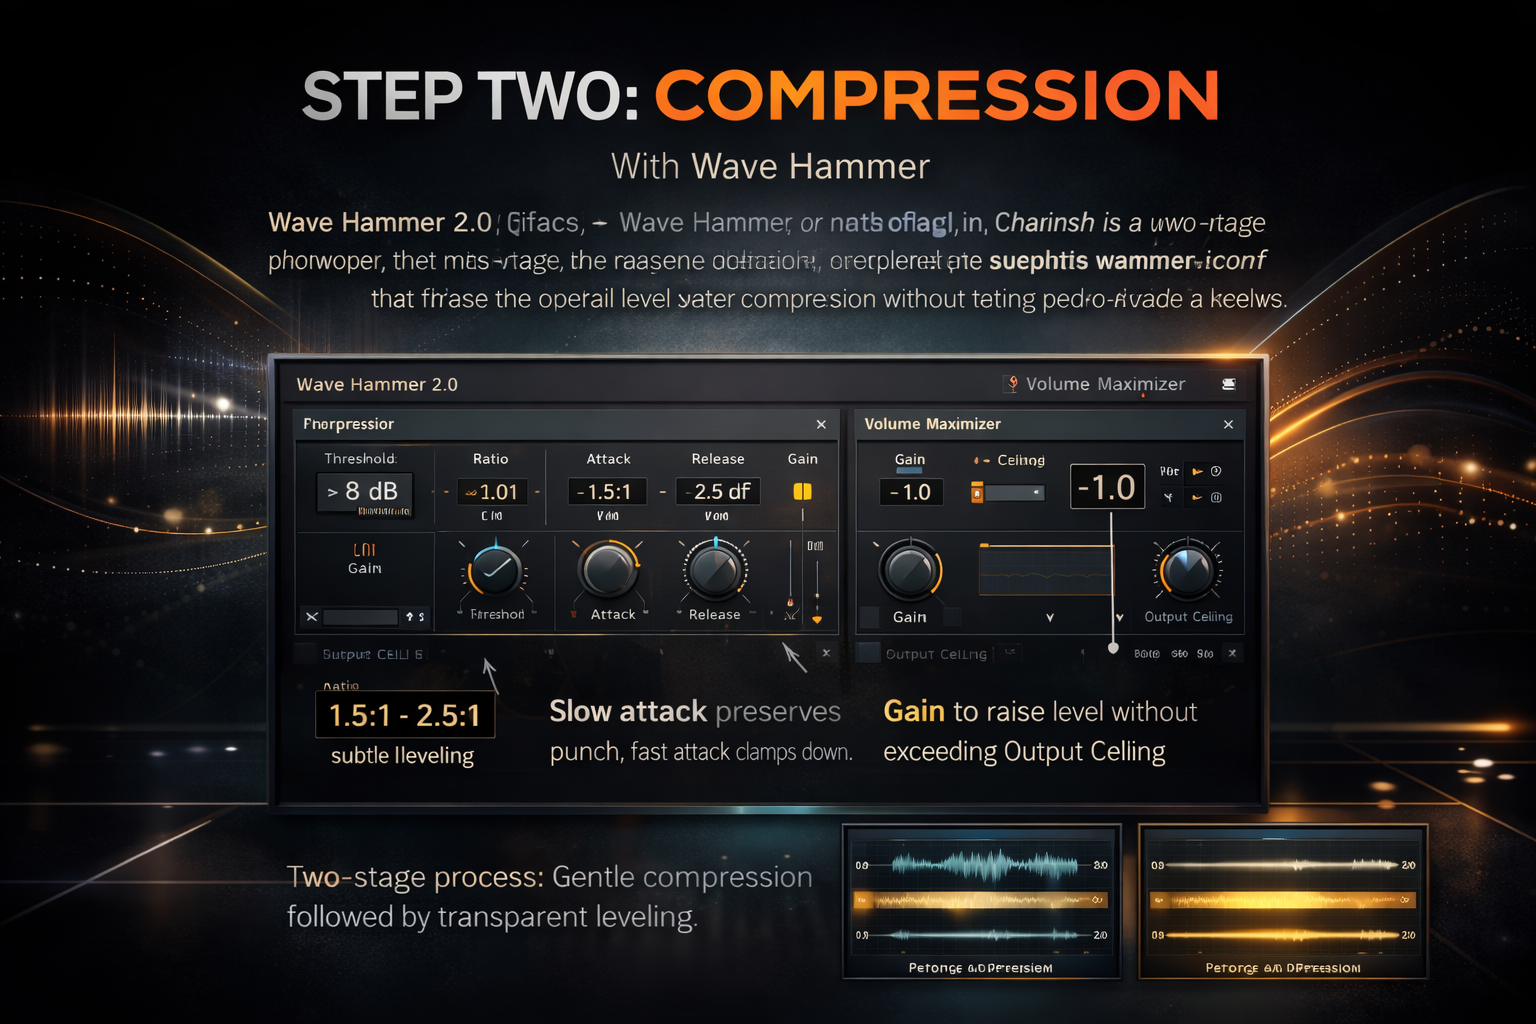
The compressor stage is the one that shapes the dynamics. For mastering purposes, a ratio between 1.5:1 and 2.5:1 is the range where compression is audible but not obvious. Higher ratios — 4:1 and above — start to flatten the natural dynamic movement of the music in ways that become difficult to undo. The attack time matters too: a slow attack (50–100ms) lets transients through and preserves the natural punch of drums and percussion; a fast attack clamps down on everything including the transients and produces a more compressed sound.
The Volume Maximizer stage has two controls: Output Ceiling and Gain. Set Output Ceiling to -1.0 dBFS — this prevents inter-sample peaks from clipping on playback devices and in lossy encoding. Then use the Gain control to raise the level until the sound fills out. Preview this through the whole Plug-In Chainer, not on a solo loop of the loudest section — the quiet passages tell you more about how much compression is too much than the loud ones do.
Two passes of Wave Hammer at gentler settings often sounds cleaner than one pass at aggressive settings. Run the chain once at conservative compression, apply, then run it again with only the Volume Maximizer stage engaged. Each pass uses a fresh signal, so the artifact accumulation is less than one heavy-handed pass. On a heavily dynamic classical-influenced track I processed last spring, two passes at 2:1 ratio gave me the level I needed with none of the suck-and-breathe artifacts I'd have gotten at 4:1 in a single pass.
Step Three: iZotope Ozone Elements
Ozone Elements is bundled with Sound Forge Pro and activates separately through iZotope's account system — if it's not showing up in your Plug-In Chainer, check that it's activated through the iZotope portal and that the .dll is in one of Sound Forge's VST search paths (Options → Preferences → VST Effects).

As a VST inside the Plug-In Chainer, Ozone Elements gives you a mastering EQ, a Maximizer, and an Imager in a single plugin. For mixes where the full mastering chain fits in one pass, running Ozone Elements as the primary mastering tool — EQ, imaging, and limiting all within Ozone — and then using Sound Forge Pro's Statistics and normalize for verification and delivery is a fast and legitimate workflow. The Maximizer in Ozone Elements handles true peak limiting more transparently than Wave Hammer's Volume Maximizer for most material, particularly music with complex high-frequency content.
Step Four: Loudness and Delivery Targets
After dynamics processing, use Process → Normalize with Loudness mode to hit a broadcast target if that's the delivery format — ATSC A/85 (-24 LUFS) or EBU R128 (-23 LUFS). For streaming platforms, the Statistics-plus-Volume-adjustment workflow covers custom targets: run Statistics, read the integrated LUFS, calculate the difference to your target (typically -14 LUFS for music streaming, -16 LUFS for podcasts and YouTube), apply the gain difference via Process → Volume, then run Statistics again to confirm. The full workflow for this step is in the normalization guide.
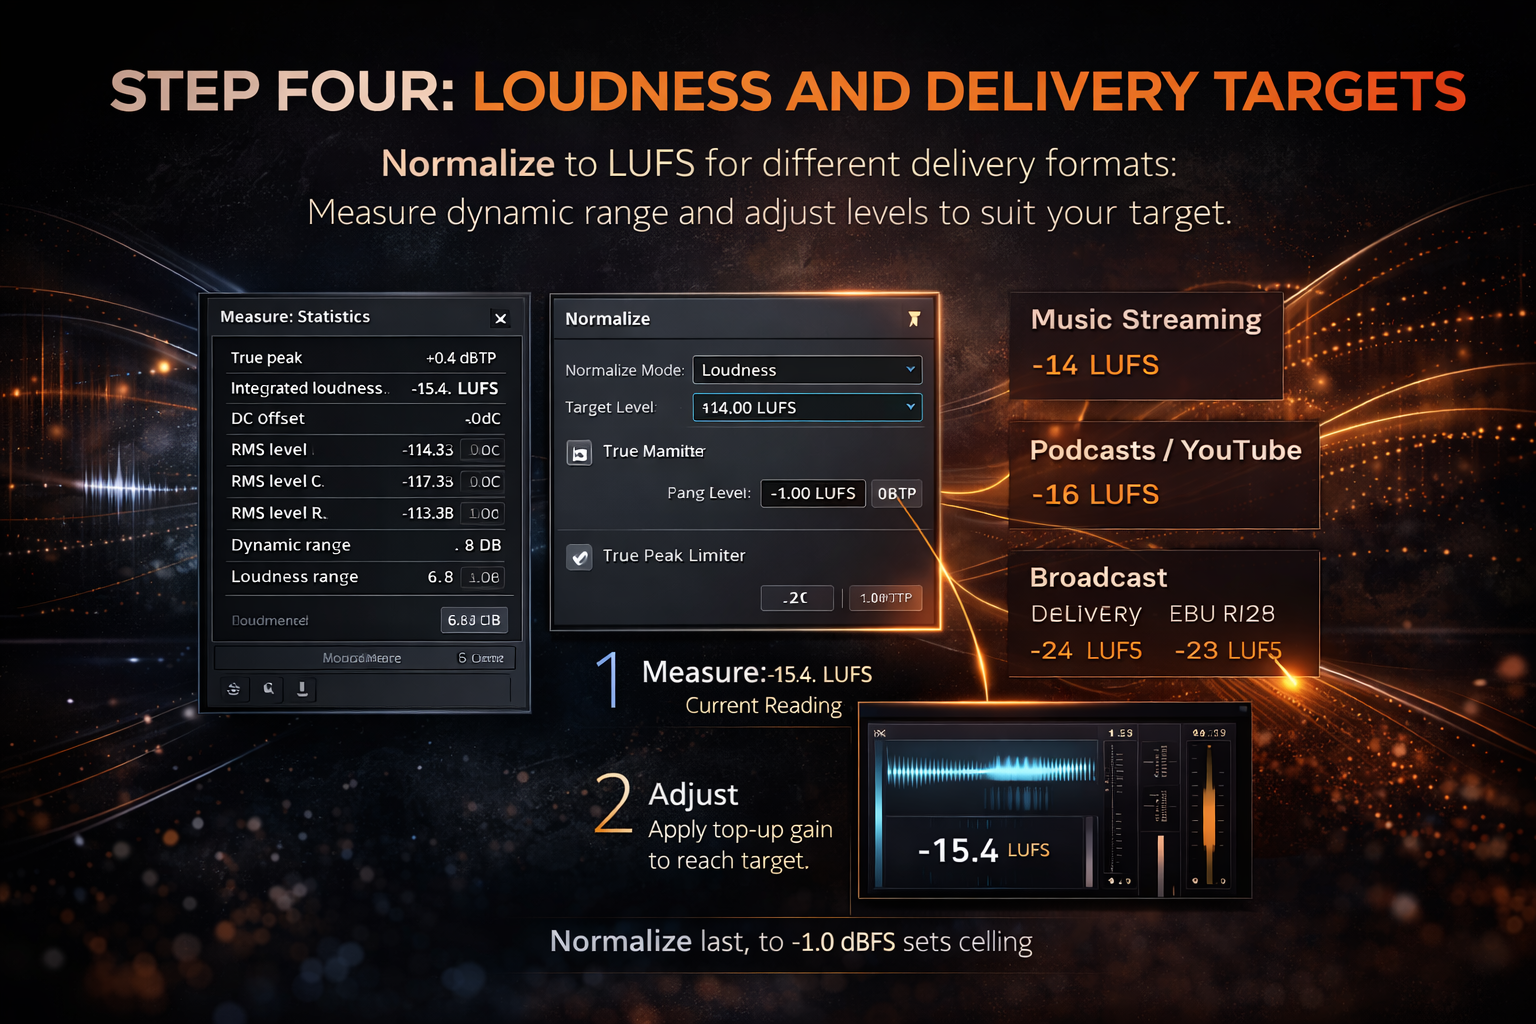
Peak normalize last, to -1.0 dBFS, after all other processing. This sets the ceiling. If running Statistics after this step shows true peak above -1.0 dBFS, something in the chain raised levels after normalization — identify it and fix it before export.
Step Five: Dithering for 16-bit Delivery
If your source file is 24-bit and the delivery format requires 16-bit — CD, certain streaming platforms, most distribution requirements — dithering is the last step before export. Dithering manages the quantization noise introduced when reducing bit depth. Without it, you get a specific kind of digital distortion at low levels that's most audible in fade-outs and quiet passages.
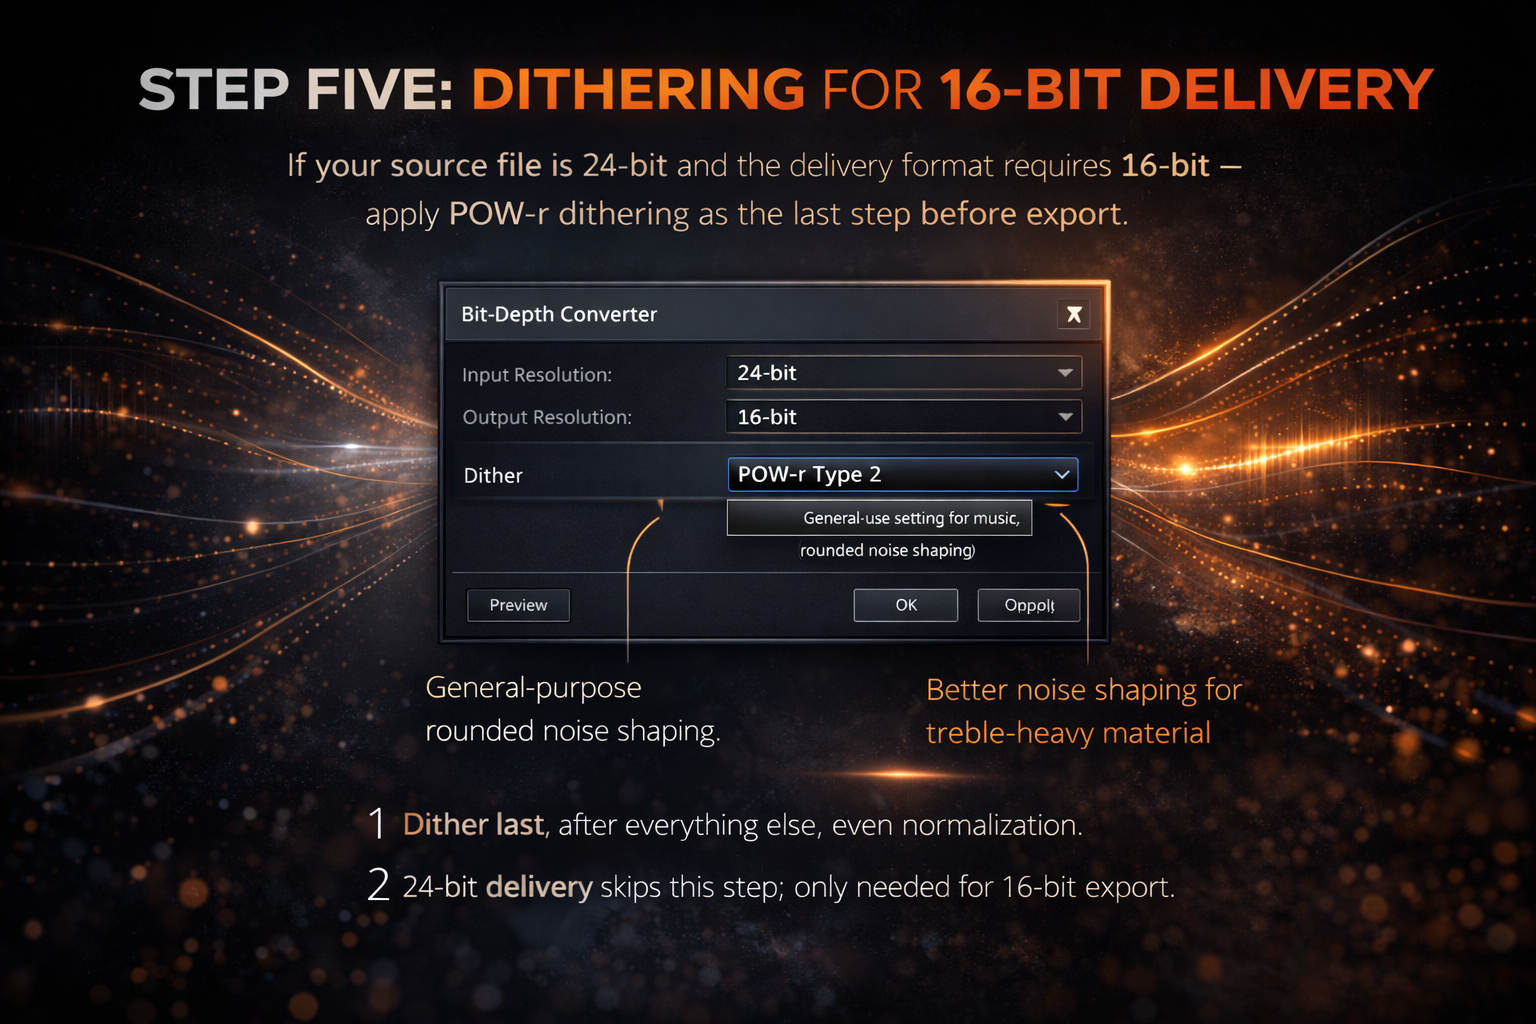
Sound Forge Pro includes POW-r dithering, accessible in the Bit-Depth Converter (Process → Bit-Depth Converter). POW-r Type 2 is the general-purpose setting for music; Type 3 introduces more noise shaping and is better for material with a lot of high-frequency content. Apply dithering as the absolute last step — after normalization, after all EQ and dynamics. If you apply any processing after dithering, you've re-introduced the quantization problem and need to dither again.
For 24-bit delivery (which most streaming platforms accept), skip dithering. It's only necessary when reducing bit depth, not when delivering at the same or higher bit depth than the source.
Verifying the Master
Run Tools → Statistics one final time. Check integrated LUFS against your delivery target, true peak against -1.0 dBFS, and listen to the result on at least three different playback systems before exporting. Check the Statistics readout against the before-state numbers you captured at the start of the session — the comparison tells you exactly what the mastering chain changed and by how much. When the numbers and the ears agree, the file is ready. The settings for exporting to MP3, WAV, and other formats are in the export guide.
The Mix Comes First
Sound Forge Pro has capable tools for every step in a mastering chain. But mastering can't fix a bad mix — it can only optimize a good one. If the low end is uncontrolled before it reaches Sound Forge, Wave Hammer will make it louder and more uncontrolled. If there's harshness in the 3 kHz range from a distorted guitar that was mixed too hot, EQ at the mastering stage will make a dent but won't eliminate it.
The best mastering sessions I've done in Sound Forge Pro were the ones where the mix was already close. Light EQ, modest compression, set the level, done. The sessions where mastering took four hours were the ones where I was trying to compensate for mix problems. It's faster to fix the mix than to master around it.
Frequently Asked Questions
What tools does Sound Forge Pro have for mastering?
Sound Forge Pro includes Paragraphic EQ, Wave Hammer 2.0 (compressor + Volume Maximizer), coreFX dynamics processors, iZotope Ozone Elements (bundled, activates separately), LUFS loudness normalization (SF Pro 15+), POW-r dithering for 16-bit conversion, and the Statistics process for non-real-time loudness measurement. The Plug-In Chainer chains them in sequence for preview before applying.
What order should I apply mastering effects in Sound Forge Pro?
EQ first, then compression and dynamics (Wave Hammer or Ozone), then loudness normalization, then peak normalization to -1.0 dBFS, then dithering if converting to 16-bit. Verify with Statistics before and after the chain. Changing this order — normalizing before EQ, or dithering before normalization — produces avoidable problems.
What is Wave Hammer in Sound Forge Pro?
Wave Hammer 2.0 is a two-stage dynamics processor. Stage one is a classic compressor that reduces peak-to-average ratio; stage two is a Volume Maximizer that raises the overall level without exceeding a user-set ceiling. For mastering, set Output Ceiling to -1.0 dBFS and use the compressor stage conservatively — ratio between 1.5:1 and 2.5:1, slow attack (50–100ms) to preserve transients.
How do I use iZotope Ozone with Sound Forge Pro?
Ozone Elements comes bundled with Sound Forge Pro and loads as a VST through the Plug-In Chainer. After installation, activate it separately through iZotope's account portal. If it doesn't appear in the Chainer, verify the .dll is in a folder listed under Options → Preferences → VST Effects. It functions as a full mastering suite inside Sound Forge's chain.
What loudness target should I master to in Sound Forge Pro?
-14 LUFS integrated for music streaming (Spotify, Apple Music). -16 LUFS for YouTube and podcasts. -23 LUFS for EBU R128 broadcast (Europe). -24 LUFS for ATSC A/85 broadcast (US). Use Process → Normalize with the Loudness preset for broadcast targets, or the Statistics + Process → Volume workflow for custom streaming targets. Always verify with Tools → Statistics after normalizing.
Do I need to dither when mastering in Sound Forge Pro?
Only when reducing bit depth — typically from 24-bit to 16-bit for CD delivery. Use Process → Bit-Depth Converter with POW-r Type 2 for most music. Apply dithering last, after all other processing including normalization. For 24-bit delivery (streaming platforms, most distribution), dithering is not needed. For a complete look at Sound Forge Pro's mastering and post-production capabilities, the Sound Forge Pro review covers the full toolkit.